Click on the icon “user” and “Profile”, you can see your email address which you use to sign up. In this page, you can change the avatar and password.
You must first visualize the hierarchy of the project. In particular, the Project will be the first level that you must create to start. Next, you will create the Package and items/tasks in turn.
You can create packages after completing the project creation step. A package is often referred to as gathering related items/tasks into the same group. A project may have one or more packages (if needed).
Items/Tasks are details belonging to a package. After creating a package, you can add items/tasks.
For example:
– Project: Email Marketing
– Package: List of loyal customers
– Items: Each item represents 1 customer’s profile
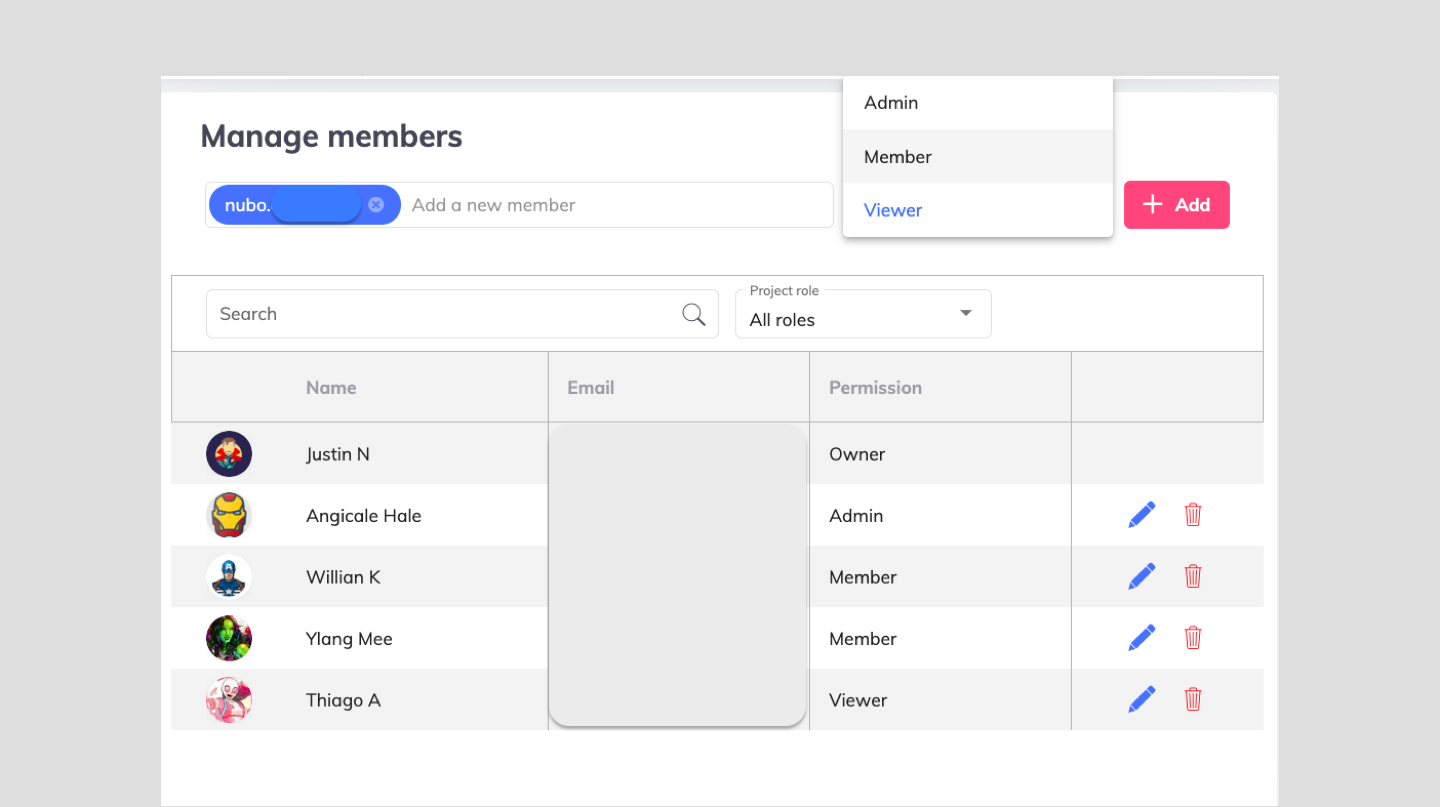
Moreover, you can add or manage the account “member” in your project and assign them the tasks,

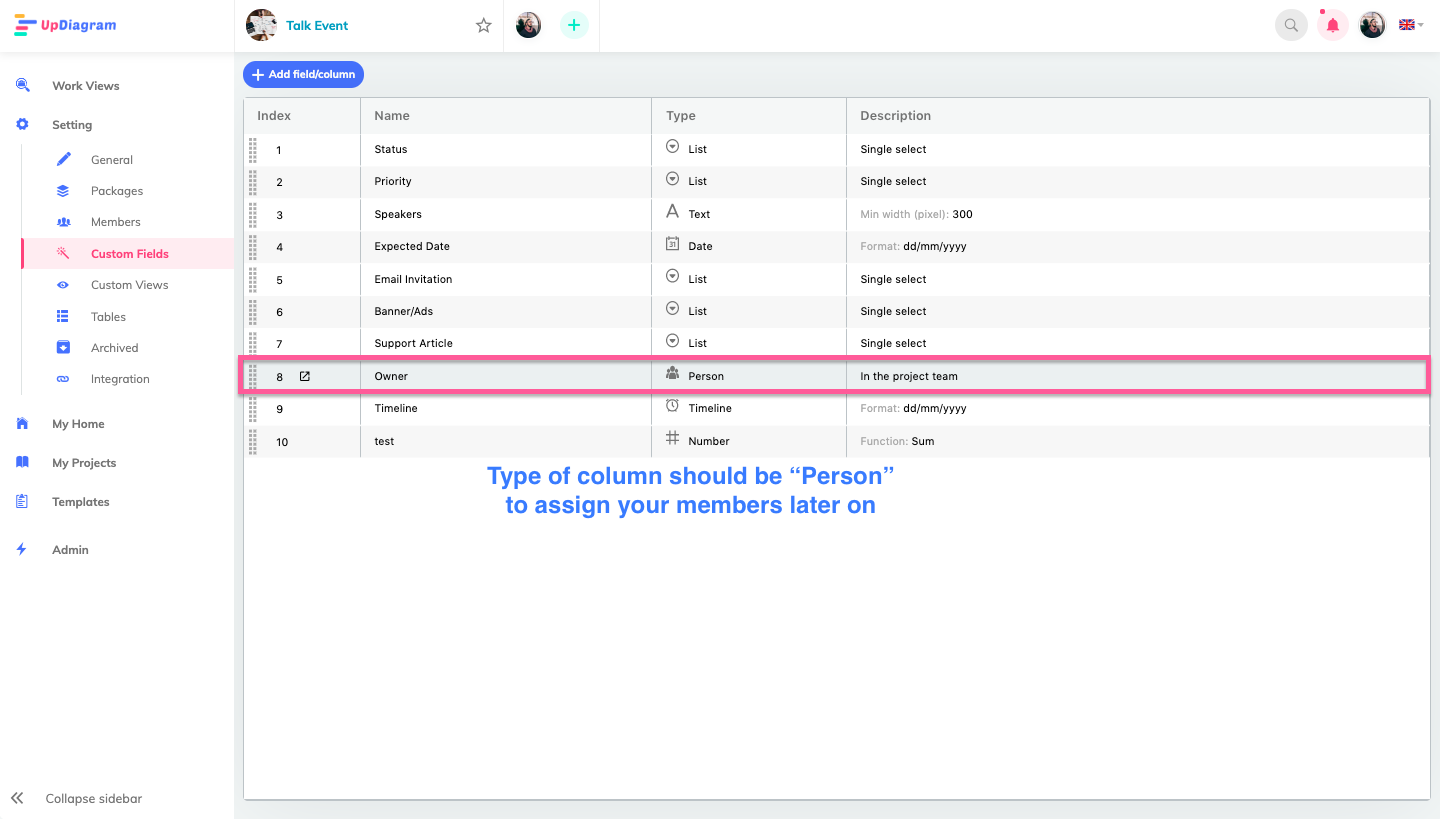
Once members have been added to the project, you can assign tasks to your members. To be able to do that, you need to use Custom Fields to create new columns.

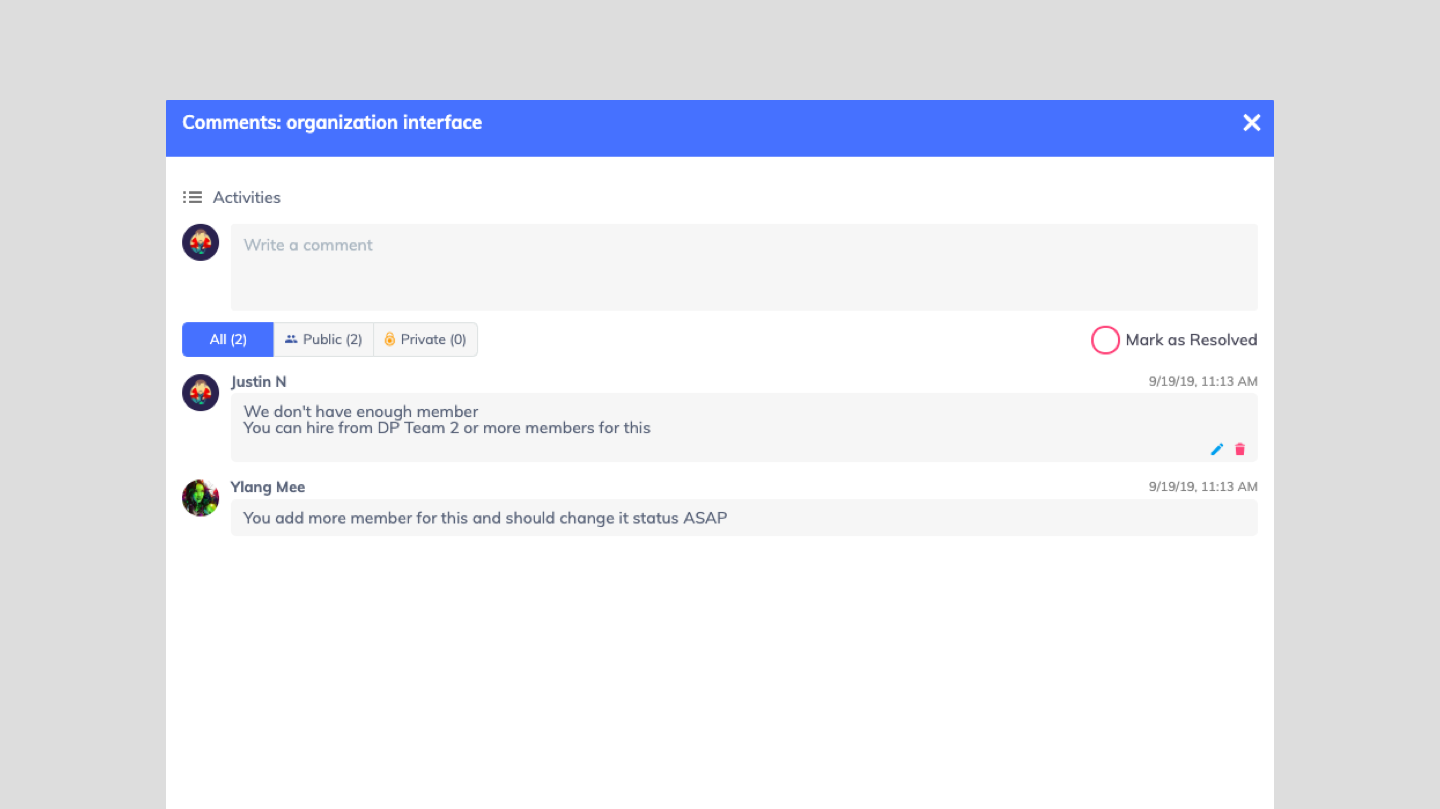
To be able to comment on tasks, you can select the icon as the image below.
There are currently two types of comments (public and private).
– (Public comment) is visible to all members
– (Private comment) is visible to the only member who makes that comment

When there are no comments yet, the icon will be white. After a new comment, the icon turns yellow. And when the comment is “resolved”, the icon turns gray. Have you answered the question How to manage the account?